| 일 | 월 | 화 | 수 | 목 | 금 | 토 |
|---|---|---|---|---|---|---|
| 1 | 2 | 3 | 4 | 5 | 6 | 7 |
| 8 | 9 | 10 | 11 | 12 | 13 | 14 |
| 15 | 16 | 17 | 18 | 19 | 20 | 21 |
| 22 | 23 | 24 | 25 | 26 | 27 | 28 |
- KakaoMap
- node
- webrtc
- html2canvas
- Flutter
- three.js
- babel
- swagger-typescript-api
- multiple camera
- hls.js
- http live streaming
- Babel standalone
- jszip
- REST API
- segment
- append row
- Redux
- typescript
- code editor
- uint16array
- uint8array
- HLS
- Prism.js
- Game js
- how to install cursor on ubuntu
- react
- M3U8
- cursor-ubuntu-installer
- localization
- Excel
- Today
- Total
Never give up
React, Node - Graphql example(feat. apollo) 본문
최근에 graphql사용하는 곳들이 생기면서 궁금해서 한번 예제를 만들어봤습니다
해당 예제는 apollo server, client로 만들었습니다
apollo-server : https://www.npmjs.com/package/apollo-server
apollo/client : https://www.npmjs.com/package/@apollo/client
먼저 노드 서버쪽을 보면
server/index.js
const ApolloServer = require('apollo-server').ApolloServer;

const resolvers = require('./resolvers/index')

const typeDefs = require('./typedefs/index')

const server = new ApolloServer({
    typeDefs,
    resolvers,
    csrfPrevention: true,
});

server.listen().then(({ url }) => {
    console.log(`🚀  Server ready at ${url}`);
});
apollo server에 typedefs, resolvers를 등록해줍니다
typedefs는 사용할 schema 및 데이터 구조를 정의하고
resolvers는 typedefs에 정의한 로직부분을 처리한다고 생각하면 될것 같습니다
server/typedefs/index.js
const gql = require('apollo-server').gql

module.exports = gql`
  type Book {
    title: String
    author: String
    test(id: Int): Test
  }

  type Test {
    user: String
    userId: Int
  }

  type Query {
    books(id: Int): Book
    test(id: Int): Test
  }
`;
apollo 서버 예제에 나와있는 book에서 조금 변형시켜서 한번 해봤습니다
(예제 링크 : https://www.apollographql.com/docs/apollo-server/getting-started/)
server/resolvers/index.js
const books = require('../model/book/index')
const test = require('../model/test/index')

module.exports = {
    Query: {
        books: (_, { id }) => {
            console.log(`[books] id : ${id}`)
            return {
                ...books[id],
                test: test[id]
            }
        },
        test: (_, args) => {
            console.log(`[test] id : ${args.id}`)
            return test[args.id]
        }
    },
}
원래는 예외처리를 따로 해줘야되는데 간단한 예제만 진행할 예정이라(귀찮아서...) 일단 하지는 않았습니다
server/model/test/index.js
module.exports = Array.from({ length: 2 }, (_, i) => {
    return {
        user: `user - ${i}`,
        userId: i
    }
})
server/model/book/index.js
module.exports = [
    {
        title: 'The Awakening',
        author: 'Kate Chopin',
    },
    {
        title: 'City of Glass',
        author: 'Paul Auster',
    },
];
필자가 사용할 모델들은 다음과 같습니다
여기까지 진행하고 테스트 해보면

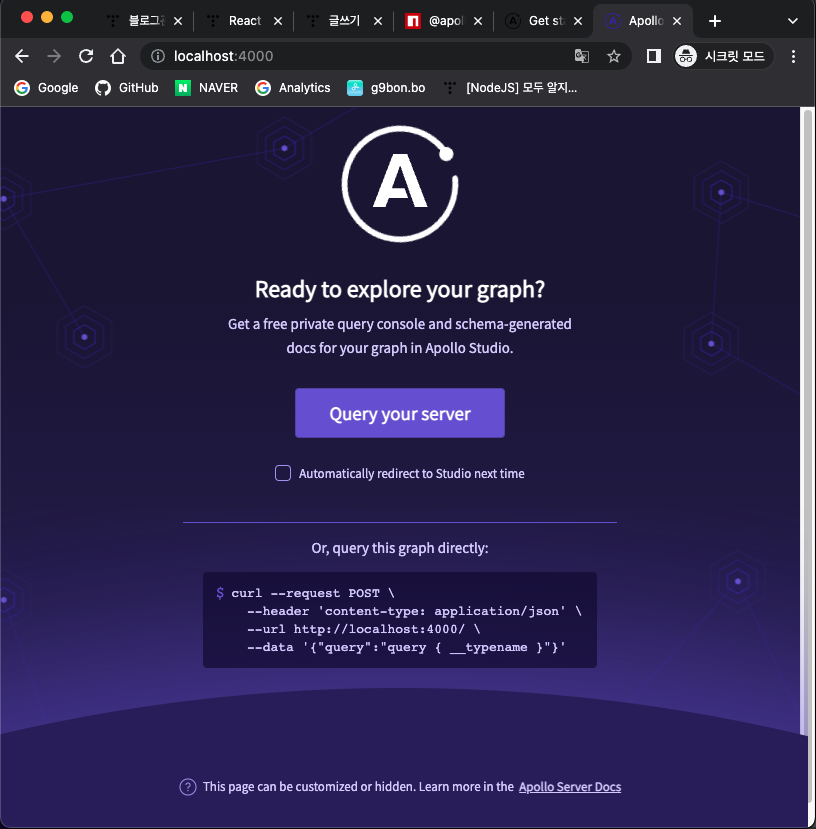
localhost port 4000으로 들어가면 다음과 같은 화면이 나옵니다
(apollo server의 default port는 4000입니다)
해당 화면으로 들어가면

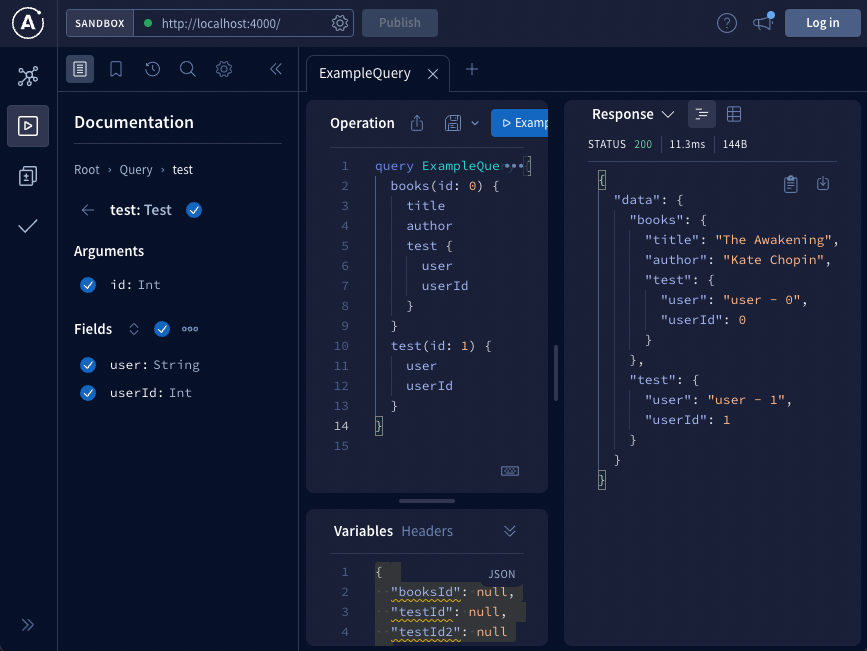
쿼리 테스트할 수 있는 화면이 나옵니다
// 요청 쿼리
query ExampleQuery {
  books(id: 0) {
    title
    author
    test {
      user
      userId
    }
  }
  test(id: 1) {
    user
    userId
  }
}

// resposne
{
  "data": {
    "books": {
      "title": "The Awakening",
      "author": "Kate Chopin",
      "test": {
        "user": "user - 0",
        "userId": 0
      }
    },
    "test": {
      "user": "user - 1",
      "userId": 1
    }
  }
}
원하는 값(id: 0, 1)을 잘 들고온것 같습니다
다음으로 react 부분을 보면
src/index.js
import { ApolloProvider } from '@apollo/client';
import React from 'react';
import ReactDOM from 'react-dom/client';
import App from './app';
import client from './client';
import reportWebVitals from './reportWebVitals';

const root = ReactDOM.createRoot(document.getElementById('root'));
root.render(
  <React.StrictMode>
    <ApolloProvider client={client}>
      <App />
    </ApolloProvider>
  </React.StrictMode>
);

reportWebVitals();
redux 셋팅하는것과 비슷하게 provider를 app 부모 태그로 넣어주고
client를 따로 정의해서 넣어줍니다
src/client.js
import { ApolloClient, InMemoryCache } from "@apollo/client"

export default new ApolloClient({
    uri: 'http://localhost:4000',
    cache: new InMemoryCache()
})
기본 포트인 4000번과 rest api에서 사용하는 http 캐싱 방법과 다른 in memory cache를 사용합니다
src/app.js
import { gql } from '@apollo/client'
import React, { useEffect, useState } from 'react'
import './app.css'
import client from './client'
import TableComponent from './components/table'

function App() {
    const [value, setValue] = useState({ loading: true, data: undefined, error: undefined })

    useEffect(() => {
        async function init() {
            const res = await client.query({
                query: gql`
                {
                    books(id: 1) {
                        title
                        author
                        test {
                            user
                            userId
                        }
                    }
                    test(id: 0) {
                        user
                        userId
                    }
                }
            `})

            const loading = res.loading
            let error

            if (res.error || res.errors) {
                error = res.error + res.errors
            }

            const data = res.data

            setValue({ loading, error, data })
        }

        init()
    }, [])

    let component

    if (value.loading) {
        component = (<p className='p_detail'>Loading...</p>)
    }

    if (value.error) {
        component = (
            <div className='div_component'>
                <p className='p_detail'>Error!</p>
                {value.error}
            </div>
        )
    }

    if (value.data) {
        const tableData = {
            book: {
                headList: ['Id', 'User', 'author', 'title'],
                bodyList: [
                    value.data.books.test.userId,
                    value.data.books.test.user,
                    value.data.books.author,
                    value.data.books.title
                ]
            },
            test: {
                headList: ['Id', 'User'],
                bodyList: [
                    value.data.test.userId,
                    value.data.test.user
                ]
            }
        }

        component = (<div className='div_component'>
            <TableComponent headList={tableData.book.headList} bodyList={tableData.book.bodyList} />
            <TableComponent headList={tableData.test.headList} bodyList={tableData.test.bodyList} />
        </div>)
    }

    return (
        <div className='div_center'>
            {component}
        </div>
    )
}

export default App
src/app.css
.div_center {
    width: 100%;
    height: 100vh;
    display: flex;
    align-items: center;
    justify-content: center;
}


table {
    margin: 40px auto 40px auto;
    box-shadow: 0 1.5px #e4e4e4;
    text-align: center;
    border-collapse: collapse;
    box-shadow: 0 0 20px rgba(0, 0, 0, 0.15);
    border-radius: 12px;
    overflow: hidden;
}

table>thead {
    background-color: #009879;
    text-align: left;
    color: white;
    font-size: 14px;
}

td {
    padding: 10px 20px 10px 20px;
    border-bottom: 0.5px solid rgba(128, 128, 128, 0.1);
    vertical-align: middle;
}

th {
    padding: 10px 20px 10px 20px;
    border-bottom: 0.5px solid rgba(128, 128, 128, 0.1);
    vertical-align: middle;
}
src/components/table.jsx
import React from 'react'

function TableComponent(props) {
    const { headList, bodyList } = props

    return (
        <table>
            <thead>
                <tr>
                    {headList.map((e, i) => (
                        <th key={`${e} - ${i}`}>
                            {e}
                        </th>
                    )
                    )}
                </tr>
            </thead>
            <tbody>
                <tr>
                    {bodyList.map((e, i) => (<td key={`${e} - ${i}`}>
                        {e}
                    </td>)
                    )}
                </tr>
            </tbody>
        </table>
    )
}

export default TableComponent
client를 이용해서 위에서 테스트한 쿼리와 그대로 만들어줬고
받은 데이터를 이용해서 table로 만들어봤습니다

쿼리부분을 따로 string으로 저장하면 조금더 깔끔한 코드가 될거 같습니다
예를들어 호출부분은 이렇게 처리하고
const res = await client.query({ query })쿼리부분은 이렇게 처리해보니
const { gql } = require("@apollo/client");

export default gql`
{
    books(id: 1) {
        title
        author
        test {
            user
            userId
        }
    }
    test(id: 0) {
        user
        userId
    }
}
`
조금 더 깔끔해진것 같습니다
추가로 useQuery, useMutation등을 써보니 더 좋아보이더군요
React-query 사용할때랑 비슷한 느낌이었습니다
  const { loading, error, data } = useQuery(gqlTest)
  const [setIdx, { loading, error, data }] = useMutation(gqlMutation)

  useEffect(() => {
    setIdx({ variables: { idx: 0 } })
  }, [])

(전체 소스 코드 : https://github.com/devmemory/graphql_example)
apollo client와 server를 이용해서 간단하게 만들어봤는데
해당 패키지 없이 구현하려면 난이도가 조금 높을것 같다는 생각이 들었습니다
'WEB' 카테고리의 다른 글
| React - Social login(Kakao, Naver , Facebook, Google) (18) | 2022.07.16 |
|---|---|
| React - make html element to pdf(Feat. jspdf, html2canvas) (4) | 2022.07.02 |
| React - Without CRA (0) | 2022.05.23 |
| React - redux toolkit example(createStore is deprecated) (0) | 2022.05.18 |
| Node - XLSX example (feat. scraping) (0) | 2022.05.11 |


